2.7: El teorema de Hyp-Leg y otros casos
- Page ID
- 114614

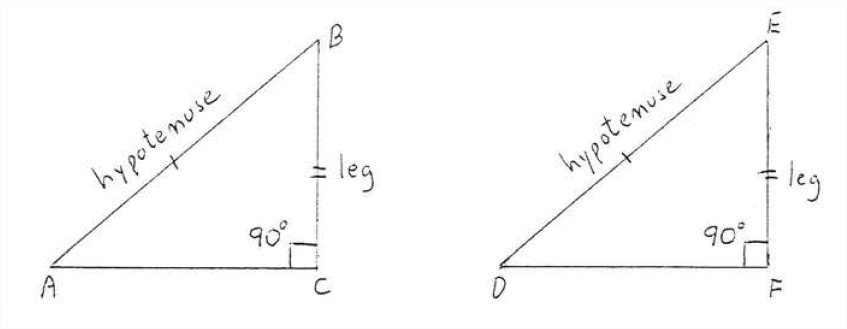
Damos una razón más para que dos triángulos sean congruentes. Tenga en cuenta que la siguiente razón se aplica solo a los triángulos rectos:
Dos triángulos rectos son congruentes si la hipotenusa y una pata de un triángulo son respectivamente iguales a la hipotenusa y una pata del otro triángulo (Hyp-Leg = Hyp-Leg)
En Figura\(\PageIndex{1}\), si\(AB = DE\) y\(BC = BF\) entonces\(\triangle ABC \cong \triangle DEF\).
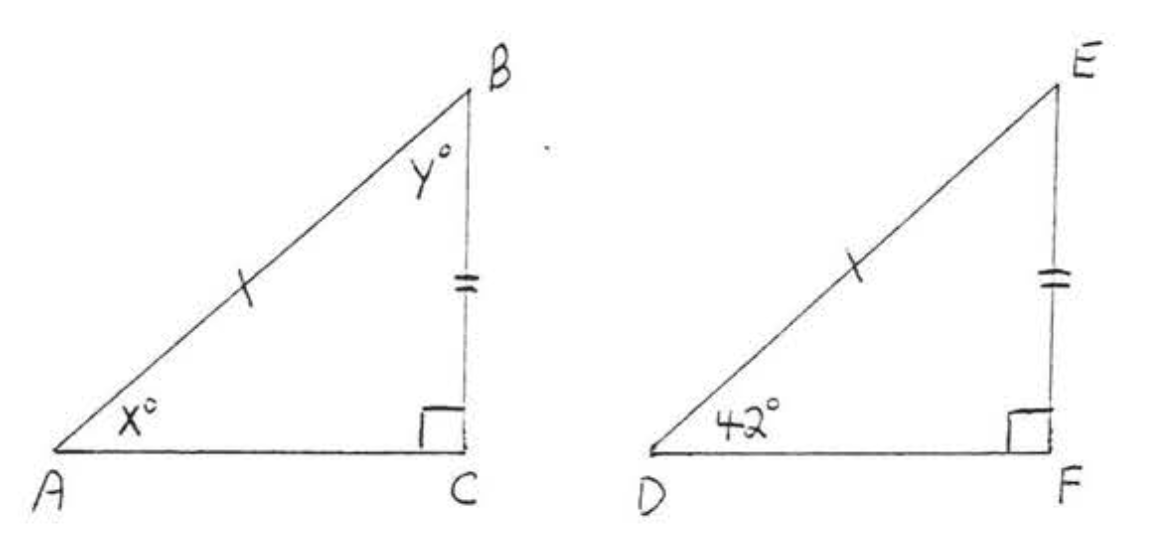
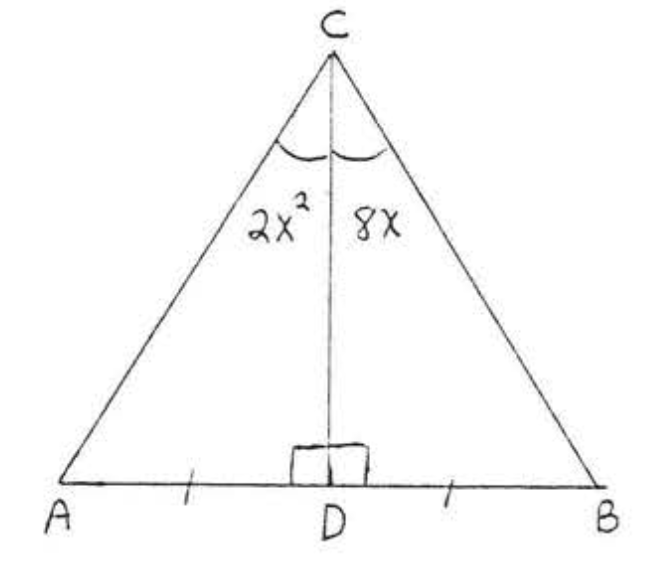
Encuentra\(x\) y\(y:\)
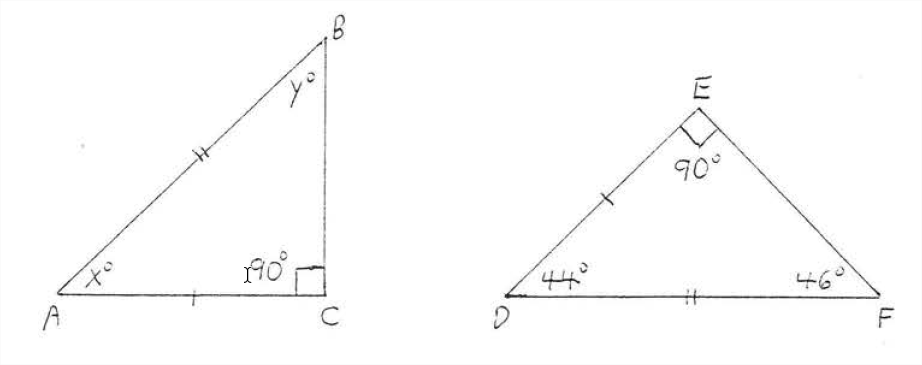
Solución
La hipotenusa de la\(\triangle ABC = AB =\) hipotenusa de\(\triangle DBF = DF\) y una pierna de\(\triangle ABC = AC =\) una pierna de\(\triangle DEF = DE\). Por lo tanto\(\triangle ABC \cong \triangle DFE\) por Hyp-Leg = Hyp-Leg. Entonces\(x^{\circ} = \angle A = \angle D = 44^{\circ}\) y\(y^{\circ} = \angle B = \angle F = 46^{\circ}\)
Responder
\(x=44, y=46\)
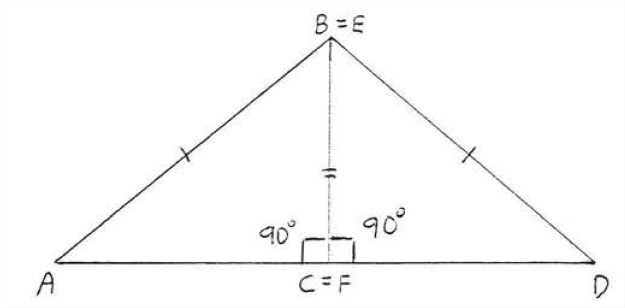
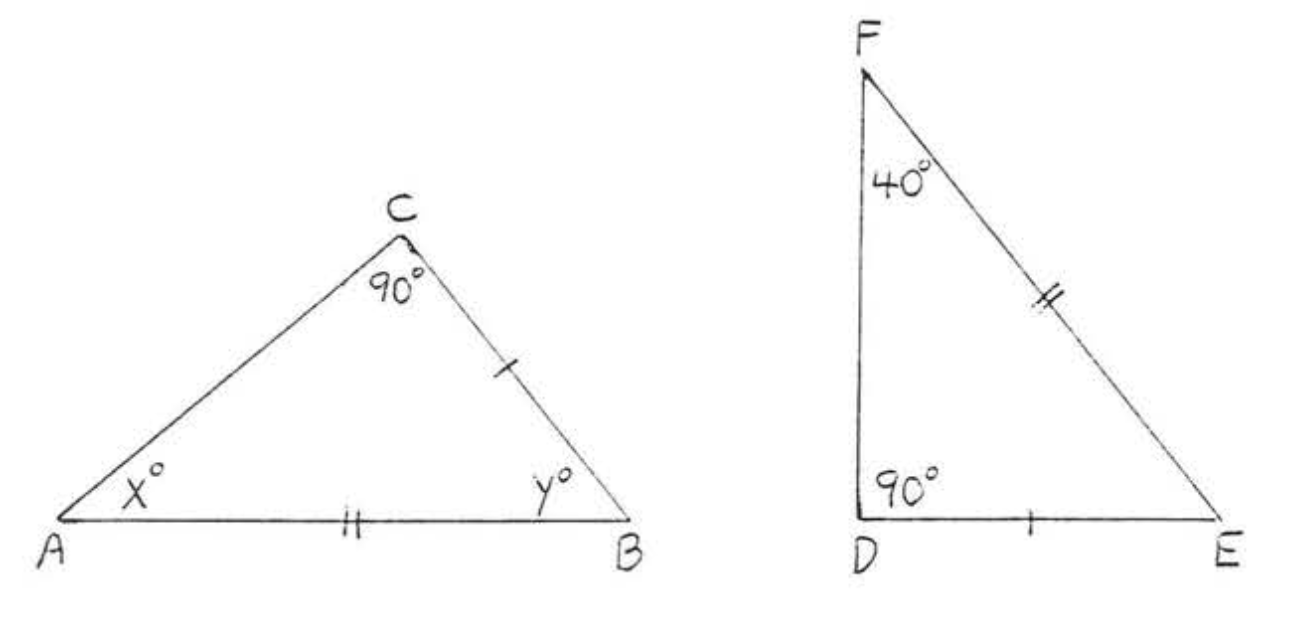
Prueba de Teorema\(\PageIndex{1}\): En Figura\(\PageIndex{1}\), coloque de\(\triangle DEF\) manera que\(BC\) y\(EF\) coincidan (ver Figura\(\PageIndex{2}\)). Entonces\(\angle ACD = 180^{\circ}\) así\(AD\) es un segmento de línea recta. \(\triangle ABD\)es isósceles con\(AB = DE.\) Por lo tanto\(\angle A = \angle D\) porque son los ángulos base del triángulo isósceles ABD (Teorema\(\PageIndex{1}\), sección 2.5). Entonces\(\triangle ABC \cong \triangle DEF\) por\(AAS = AAS\).
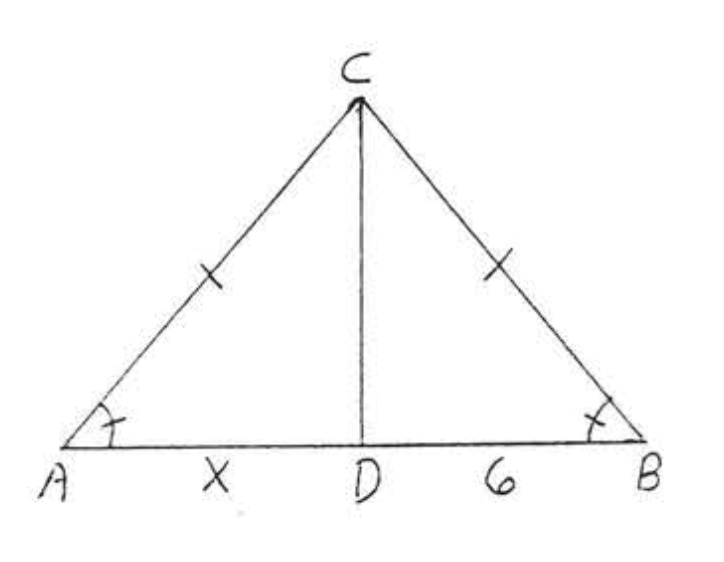
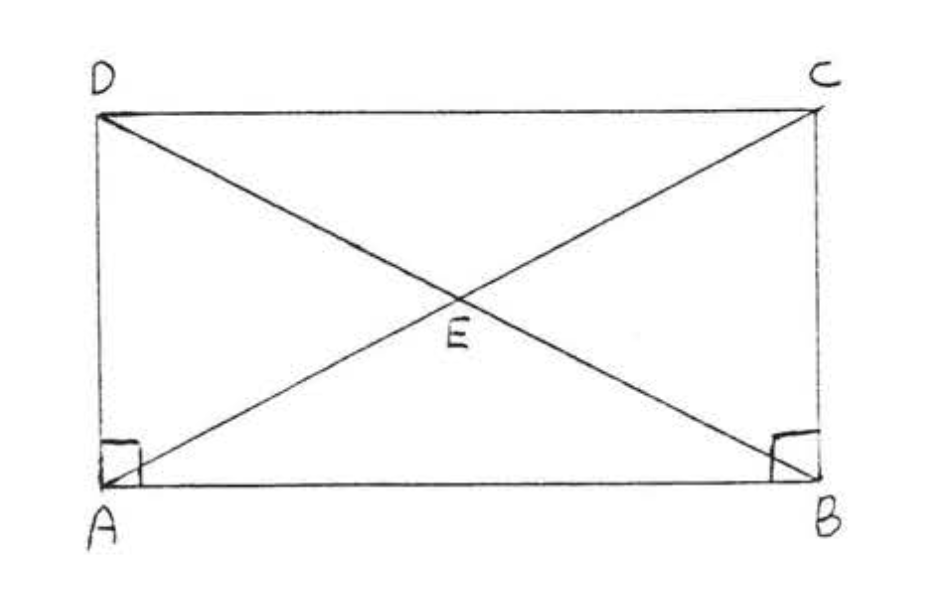
Dado\(AC = BC, CD \perp AB\). Demostrar\(AD = BD\).
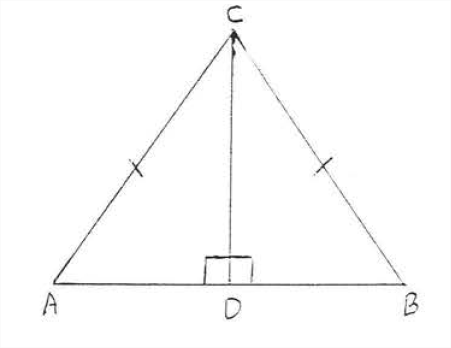
Solución
| Declaraciones | Razones |
| 1. \(AC = BC\). | 1. Dado. |
| 2. \(CD = CD\). | 2. Identidad. |
| 3. \(\angle ADC = \angle BDC = 90^{\circ}\). | 3. Dado\(CD \perp AB\). |
| 4. \(\triangle ACD \cong \triangle BCD\). | 4. Pierna Hyp = Pierna Hyp: Hyp\(AC\), Pierna\(CD\) de\(\triangle ACD =\) Hyp\(BD\), Pierna\(CD\) de\(\triangle BCD\). |
| 5. \(AD = BD\). | 5. Los lados correspondientes de los triángulos congruentes son iguales. |
En este punto el alumno podría estar listo para concluir que dos triángulos son congruentes siempre que tres lados o ángulos correspondientes sean iguales. Sin embargo esto no es cierto en los dos casos siguientes:
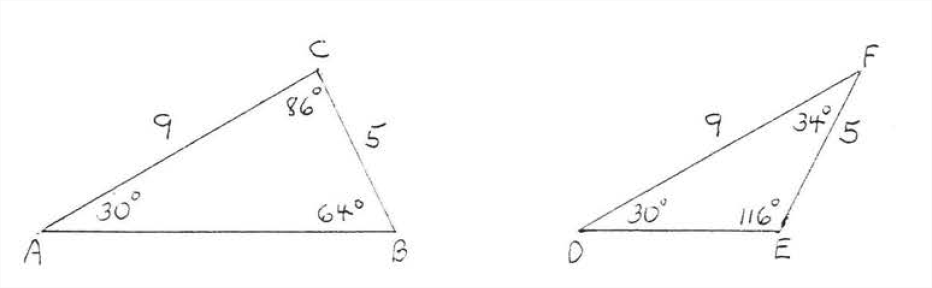
- Puede haber dos triángulos que no sean congruentes pero que tengan dos lados iguales y un ángulo igual no incluido (SSA = SSA).
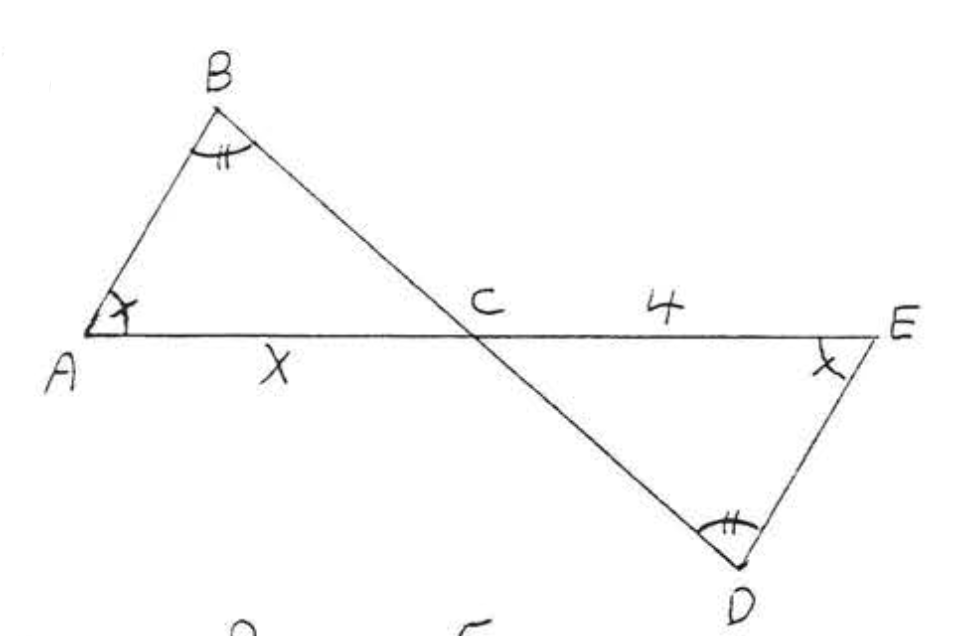
En Figura\(\PageIndex{3}\), \(AC = DF, BC = BF,\) y\(\angle A = \angle D\) pero ninguno de los otros ángulos o lados son iguales.
- Hay muchos triángulos que no son congruentes pero tienen los mismos tres ángulos\((AAA = AAA)\)
En\(\PageIndex{4}\), la Figura los ángulos correspondientes son iguales pero los lados correspondientes no lo son.
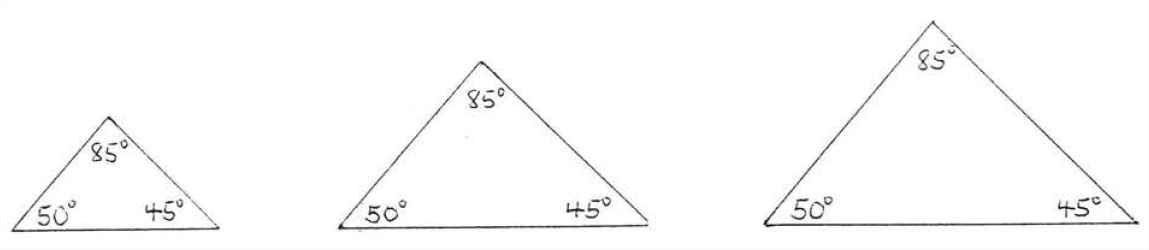
Si\(AAA = AAA\) los triángulos se saldan para ser similares. Triángulos similares se discuten en el Capítulo IV.
Determinar si los triángulos son congruentes. Si es así escribe la declaración de congruencia y encuentra\(x\).
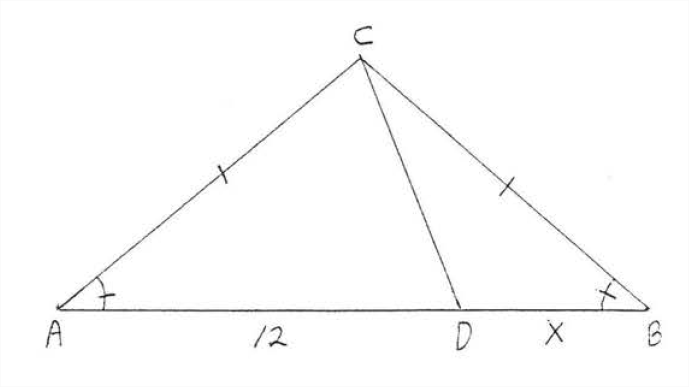
Solución
Solución: A partir del diagrama\(AC = BC, CD = CD,\) y\(\angle A = \angle B\) Estos son los únicos pares de lados y ángulos que pueden demostrarse iguales. \(\angle A\)no está incluido entre lados\(AC\) y\(CD\) y no\(\angle B\) está incluido entre lados\(BC\) y\(CD\). Por lo tanto sólo tenemos\(SSA = SSA\). No podemos concluir que los triángulos son congruentes y no podemos encontrar\(x\).
Respuesta: Los triángulos no pueden demostrarse congruentes.
Resumen
| Motivos válidos de congruencia | Motivos inválidos de congruencia |
| \(SAS = SAS\) | \(SSA = SSA\) |
| \(ASA = ASA\) | \(AAA = AAA\) |
| \(AAS = AAS\) | |
| \(SSS = SSS\) | |
| Hyp-Leg = Hyp-Leg (solo triángulos rectos) |
Problemas
1 - 16. Para cada uno de los siguientes determinar si los triángulos son congruentes. Si es así
(1) escribir la declaración de congruencia,
2) dar la razón de (1),
(3) encontrar\(x\), o\(x\) y\(y\), o\(x\)\(y\), y\(z\),
De lo contrario escribe “los triángulos no pueden demostrarse congruentes”.
1.
2.
3.
4.
5.
6.
7.
8.
9.
10.
11.
12.
13.
14.

15.
16.
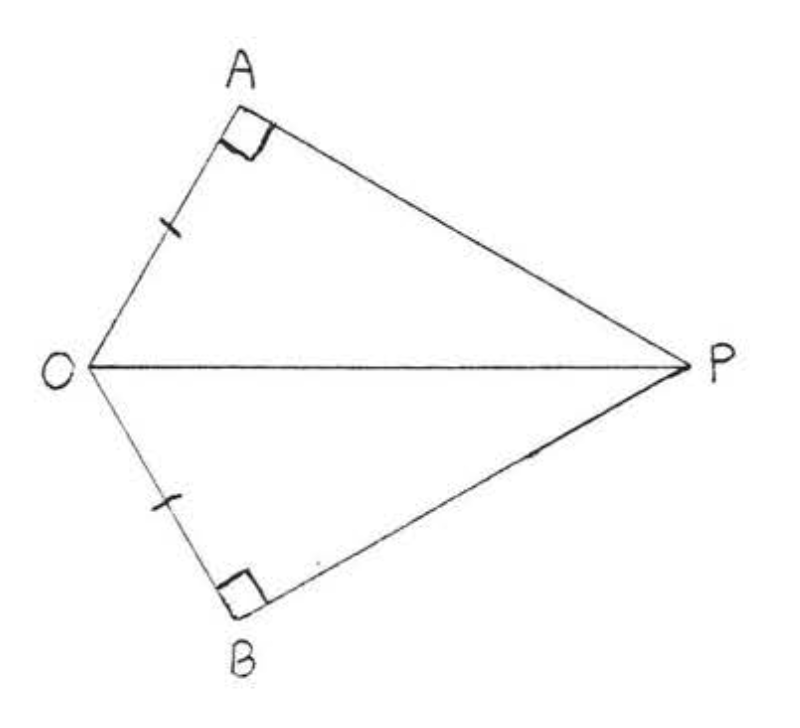
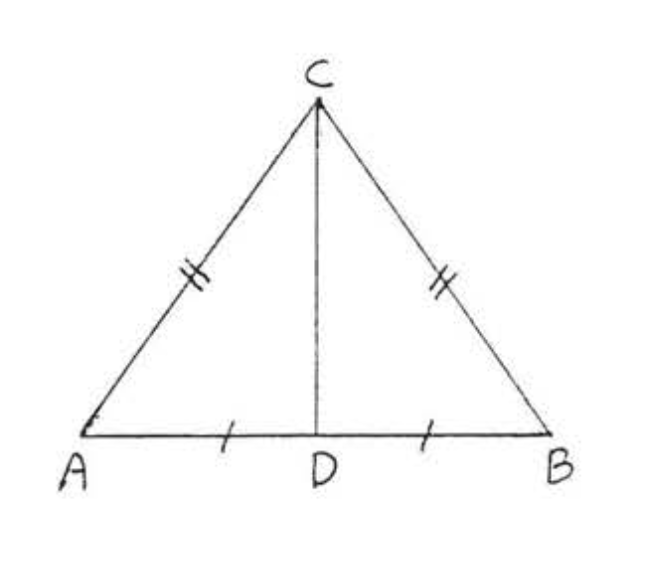
17. Dado\(CA = CB\) y\(\angle A = \angle B = 90^{\circ}\). Demostrar\(AP = BP\).
18. Dado\(AC = BD\) y\(\angle A = \angle B = 90^{\circ}\). Demostrar\(AD = BC\). (Pista: Mostrar\(\triangle ABC \cong \triangle BAD\))
19. Dado\(AB = CD\) y\(AD = CB\). Demostrar\(\angle A = \angle C\).

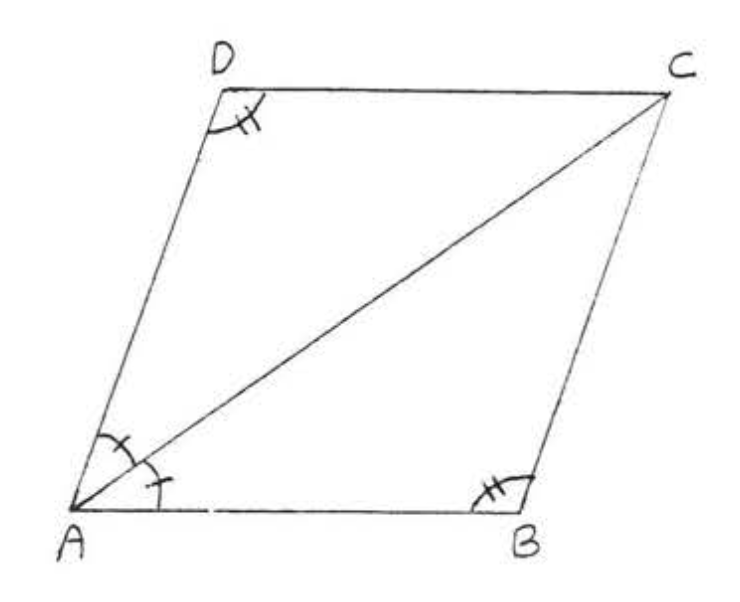
20. Dado\(AC = BC\) y\(AD = BD\). Demostrar\(\angle A = \angle B\).
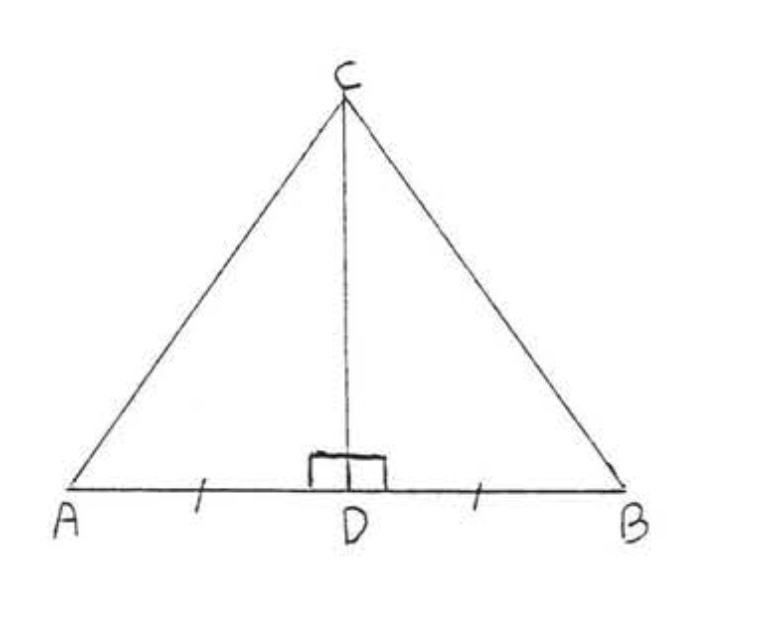
21. Dado\(AD = BD\) y\(AB \perp CD\). Demostrar\(\angle A = \angle B\).
22. Dado\(\angle BAC = \angle DAC\) y\(\angle B = \angle D\). Demostrar\(AB = AD\).