
6.3: El Área de un Triángulo
- Page ID
- 114648

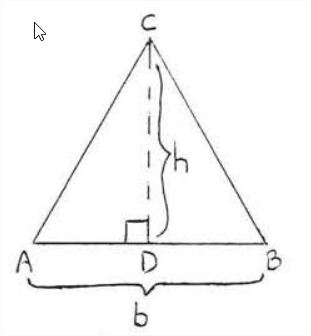
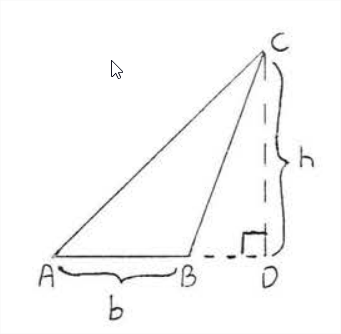
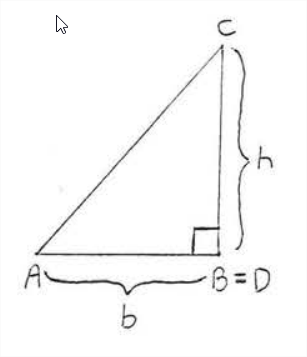
Para cada uno de los triángulos de la Figura\(\PageIndex{1}\), lado\(AB\) se llama la base y\(CD\) se llama la altura o altitud dibujada a esta base. La base puede ser cualquier estado del triángulo aunque generalmente se elige para ser el lado en el que el triángulo parece estar descansando. La altura es la línea dibujada perpendicular a la base desde el vértice opuesto. Tenga en cuenta que la altura puede caer fuera del triángulo, Si el triángulo es obtuso, y que la altura puede ser una de las patas, si el triángulo es un triángulo rectángulo.
El área de un triángulo es igual a la mitad de su base multiplicada por su altura.
\[A = \dfrac{1}{2} bh\]
- Prueba
-
Para cada uno de los triángulos ilustrados en la Figura\(\PageIndex{1}\), dibuje\(AE\) y\(CE\) así\(ABCE\) es un paralelogramo (Figura\(PageIndex{2}\)). \(\triangle ABC \cong \triangle CEA\)así área de\(\triangle ABC = \text{ area of } \triangle CEA\). Por lo tanto área de\(\triangle ABC = \dfrac{1}{2} \text{ area of parallelogram } ABCE = \dfrac{1}{2} bh\).

Figura\(\PageIndex{2}\): Dibujar\(AE\) y\(CE\) así\(ABCE\) es un paralelogramo.
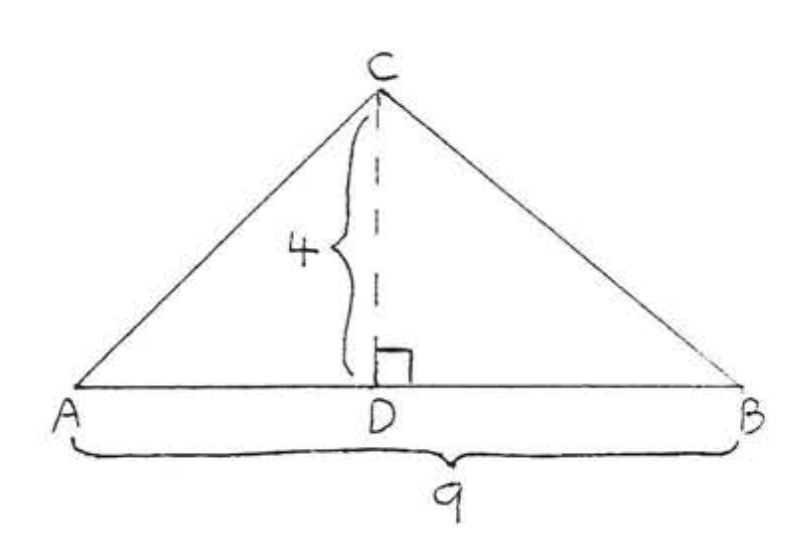
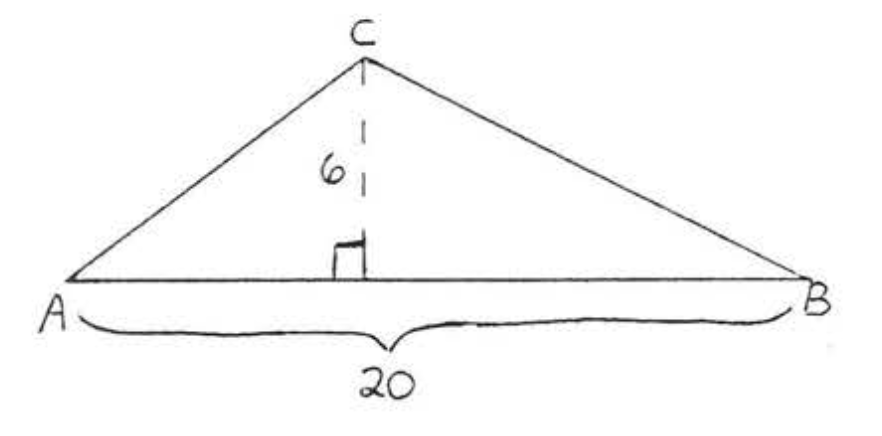
Encuentra la zona:
Solución
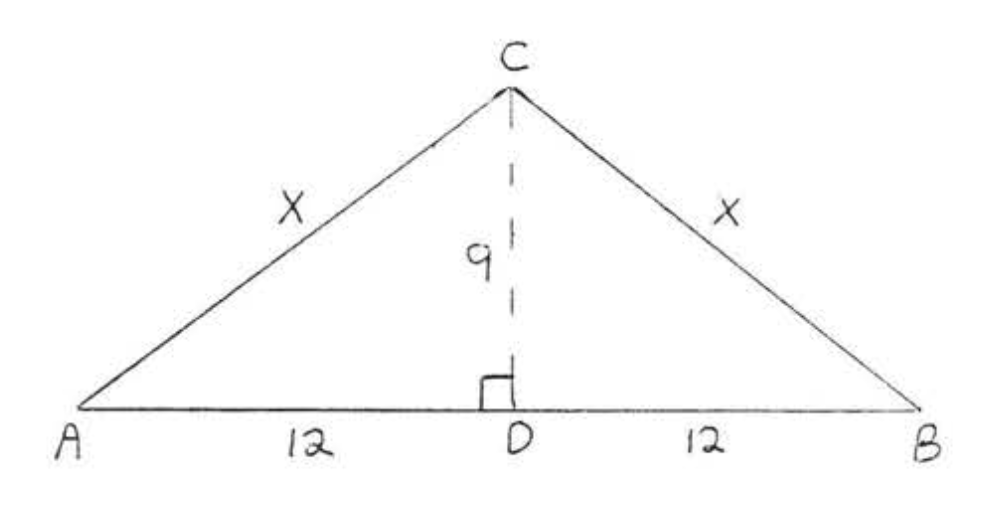
\(A = \dfrac{1}{2} bh = \dfrac{1}{2} (9) (4) = \dfrac{1}{2} (36) = 18.\)
Respuesta: 18.
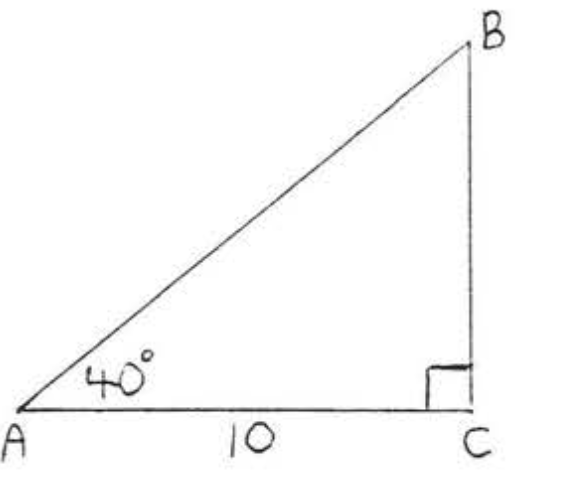
Encuentra el área a la décima más cercana:
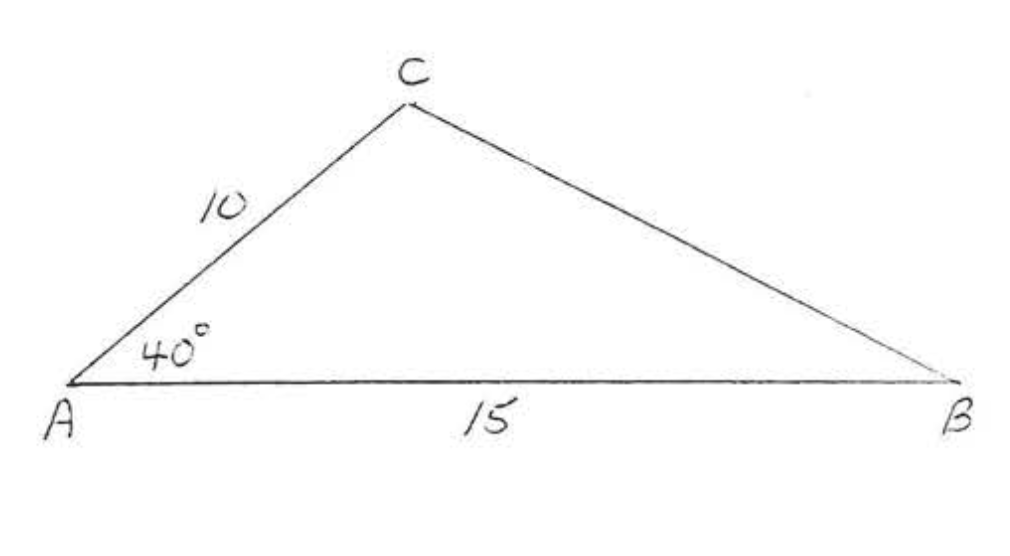
Solución
Dibuja la altura\(h\) como se muestra en la Figura\(\PageIndex{3}\)
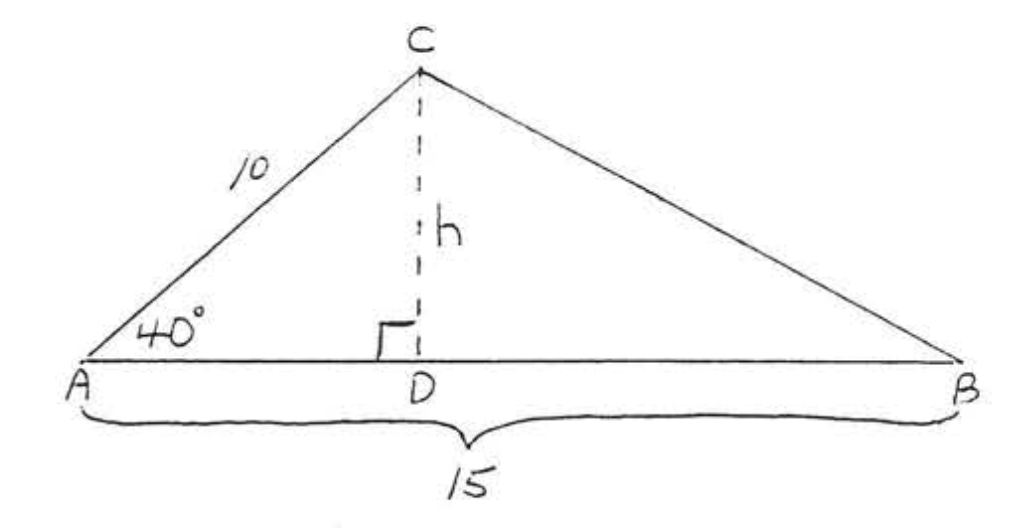
\[\begin{array} {rcl} {\sin 40^{\circ}} & = & {\dfrac{h}{10}} \\ {.6428} & = & {\dfrac{h}{10}} \\ {(10)(.6428)} & = & {\dfrac{h}{10}(10)} \\ {6.428} & = & {h} \end{array}\]
Área =\(\dfrac{1}{2} bh = \dfrac{1}{2} (15)(6.428) = \dfrac{1}{2} (96.420) = 48.21 = 48.2\)
Respuesta:\(A = 48.2\)
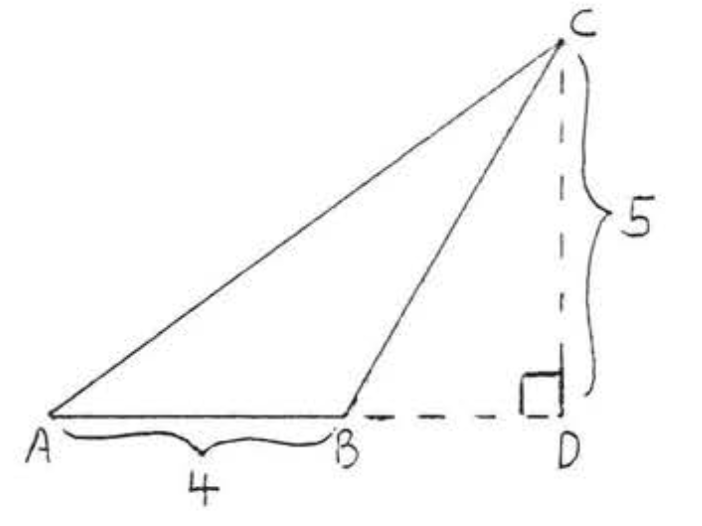
Encuentra el área y perímetro:
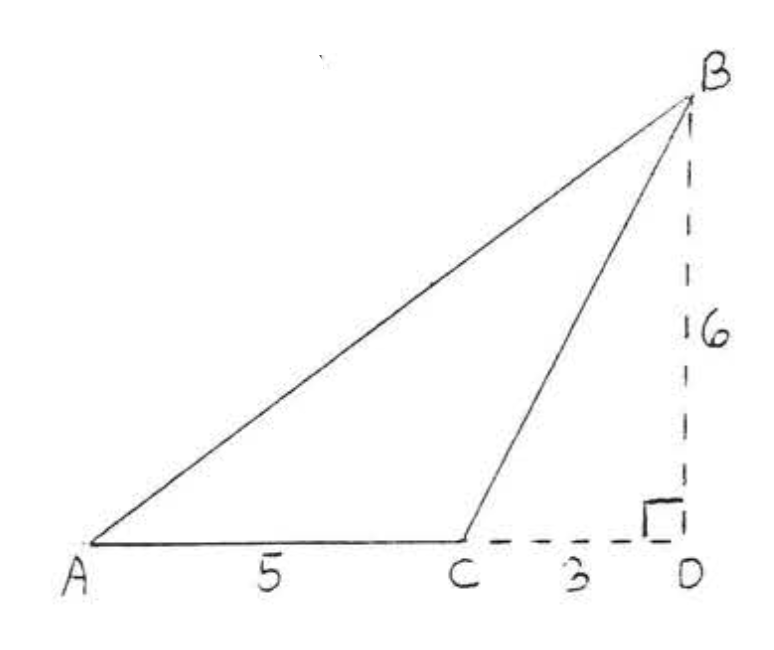
Solución
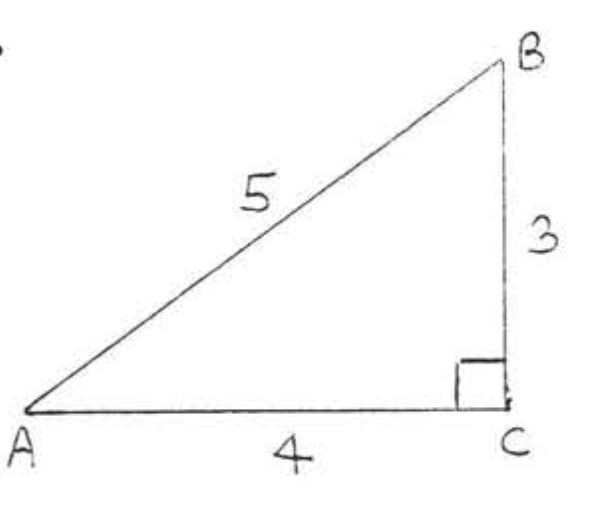
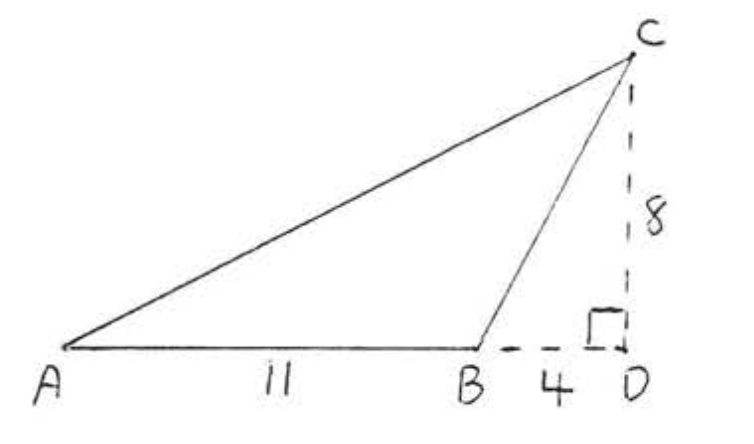
\(A = \dfrac{1}{2} bh = \dfrac{1}{2} (5)(6) = \dfrac{1}{2} (30) = 15.\)
Para encontrar\(AB\) y\(BC\) usamos el teorema de Pitágoras:
\(\begin{array} {rcl} {\text{AD}^2 + \text{BD}^2} & = & {\text{AB}^2} \\ {8^2 + 6^2} & = & {\text{AB}^2} \\ {64 + 36} & = & {\text{AB}^2} \\ {100} & = & {\text{AB}^2} \\ {10} & = & {\text{AB}} \end{array}\)\(\begin{array} {rcl} {\text{CD}^2 + \text{BD}^2} & = & {\text{BC}^2} \\ {3^2 + 6^2} & = & {\text{BC}^2} \\ {9 + 36} & = & {\text{BC}^2} \\ {45} & = & {\text{BC}^2} \\ {\text{BC} = \sqrt{45}} & = & {\sqrt{9} \sqrt{5} = 3\sqrt{5}} \end{array}\)
Perímetro =\(AB + AC + BC = 10 + 5 + 3\sqrt{5} = 15 + 3 \sqrt{5}\)
Respuesta:\(A = 15, P = 15 + 3\sqrt{5}\).
Encuentra el área y perímetro:
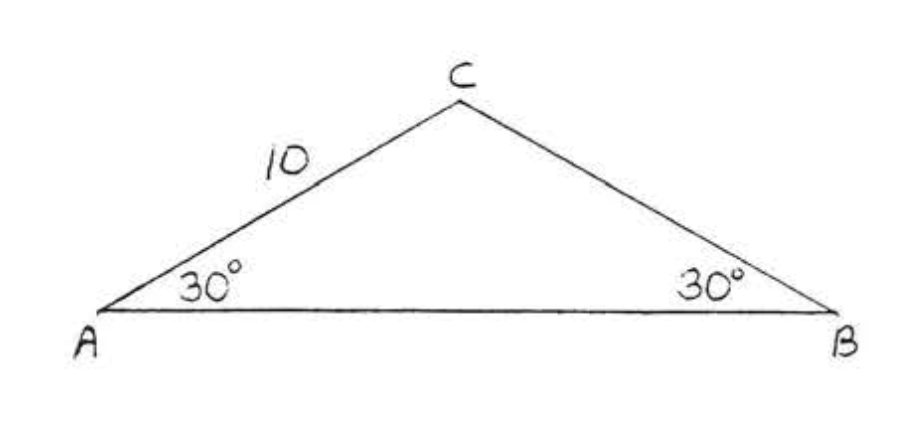
Solución
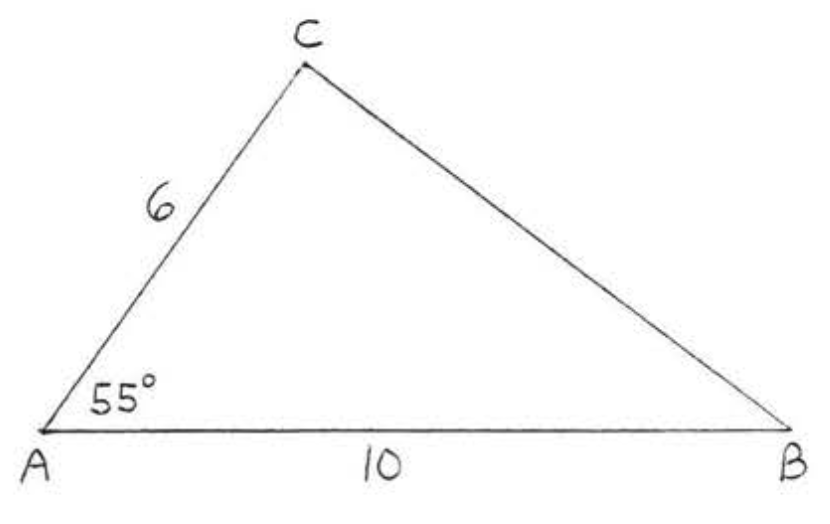
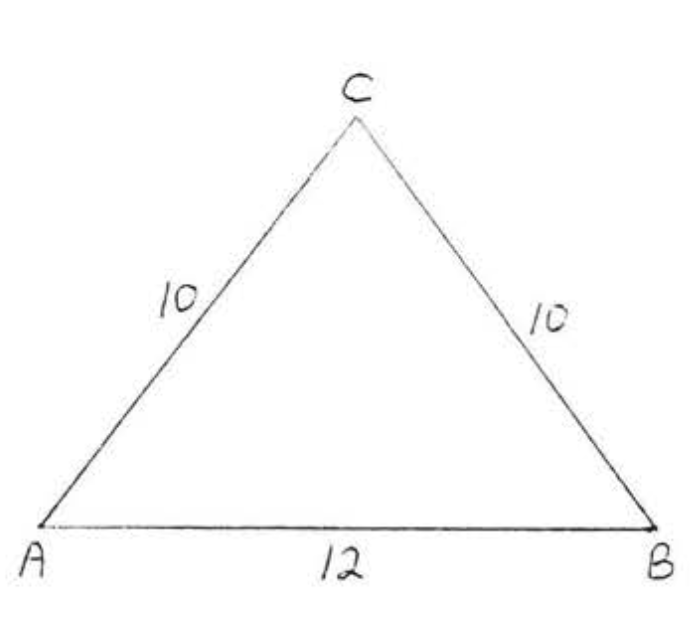
\(\angle A = \angle B = 30^{\circ}\)así\(\triangle ABC\) es isósceles con\(BC = AC = 10\). Altura de dibujo\(h\) como en la Figura\(\PageIndex{4}\).
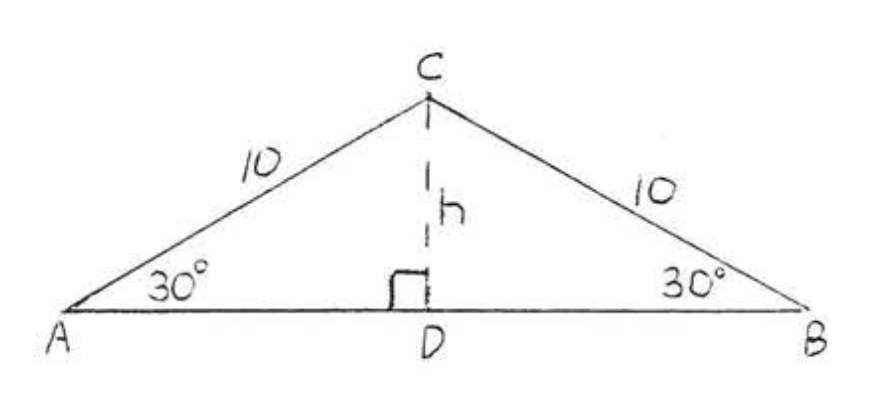
\(\triangle ACD\)es un\(30^{\circ} - 60^{\circ} -90^{\circ}\) triángulo por lo tanto
\[\begin{array} {rcl} {\text{hypotenuse}} & = & {2 (\text{short leg})} \\ {10} & = & {2h} \\ {5} & = & {h} \\ {\text{long leg}} & = & {(\text{short leg}) (\sqrt{3})} \\ {AD} & = & {h\sqrt{3} = 5\sqrt{3}.} \end{array} \]
De igual manera\(BD = 5\sqrt{3}\).
Área =\(\dfrac{1}{2} bh = \dfrac{1}{2} (5\sqrt{3} + 5\sqrt{3})(5) = \dfrac{1}{2} (10\sqrt{3})(5) = \dfrac{1}{2}(50\sqrt{3}) = 25\sqrt{3}\).
Perímetro =\(10 + 10 + 5\sqrt{3} + 5 \sqrt{3} = 20 + 10 \sqrt{3}\).
Respuesta:\(A = 25\sqrt{3}, P = 20 + 10 \sqrt{3}\).
Problemas
1 - 4. Encuentra el área de\(\triangle ABC\):
1.
2.

3.
4.
5 - 6. Encuentra el área a la décima más cercana:
5.

6.
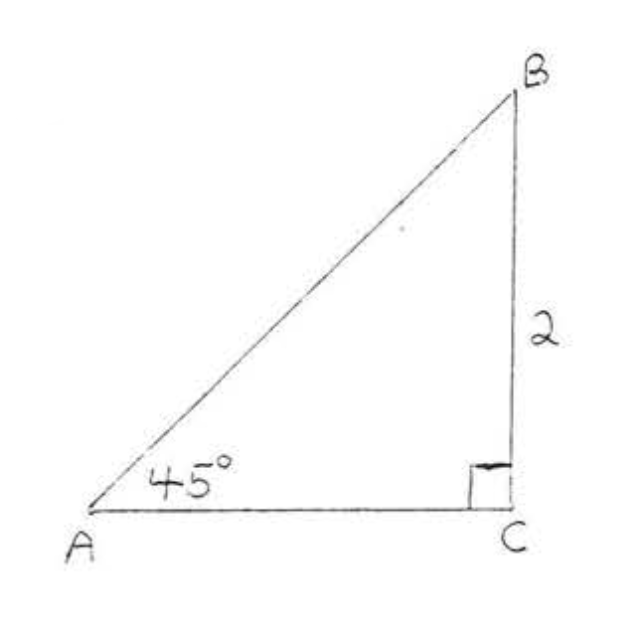
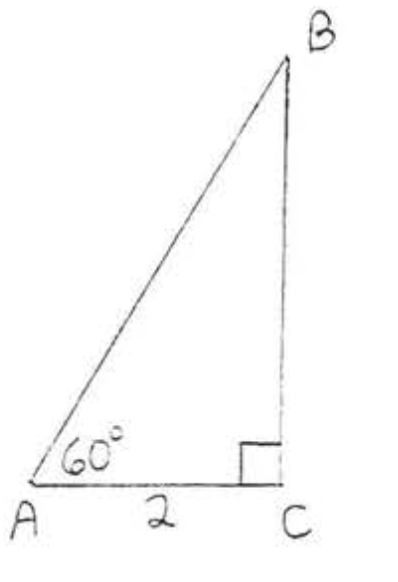
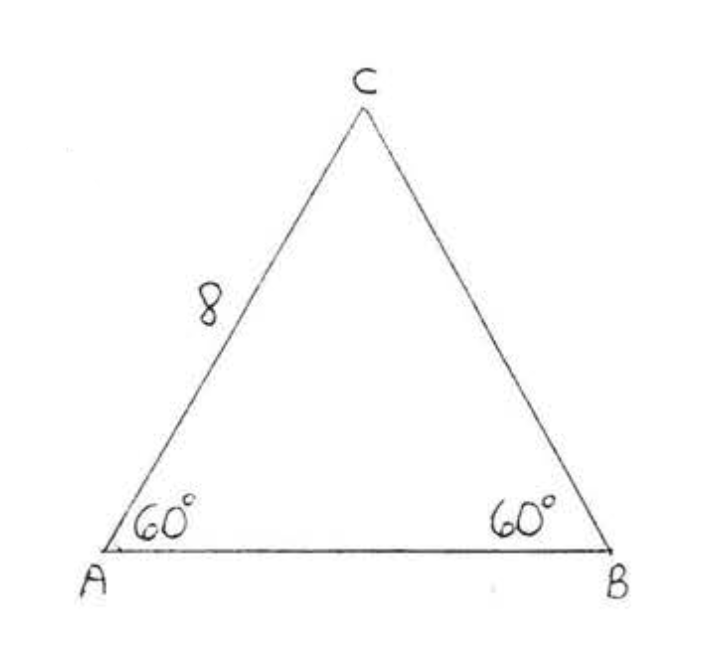
7 - 20. Encuentra el área y perímetro de\(\triangle ABC\):
7.
8.
9.
10.
11.
12.
13.
14.
15.
16.
17.
18.

19 - 20. Encuentra el área y perímetro a la décima más cercana:
19.
20.
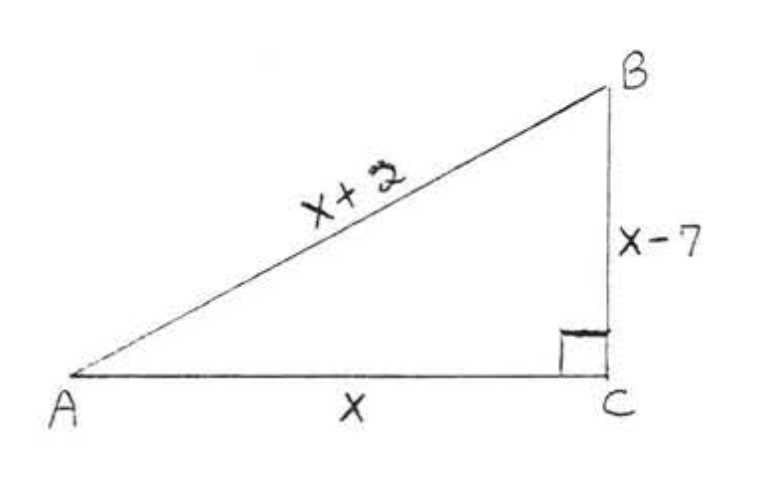
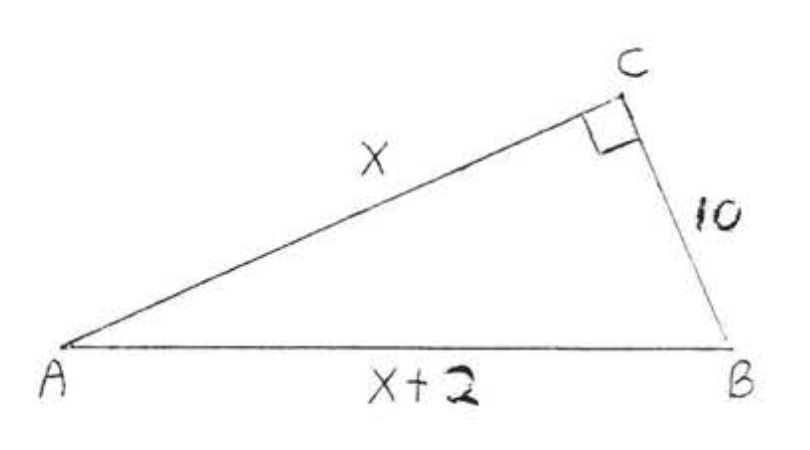
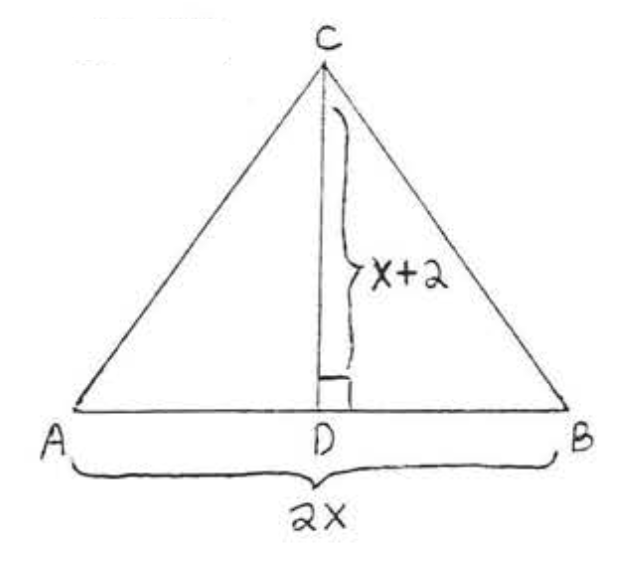
21. Encuentra\(x\) si el área de\(\triangle ABC\) es 35:
22. Encuentra\(x\) si el área de\(\triangle ABC\) es 24.

23. Encuentra\(x\) si el área de\(\triangle ABC\) es 12:
24. Encuentra\(x\) si el área de\(\triangle ABC\) es 108:
