6.4: La zona de un rombo
- Page ID
- 114675

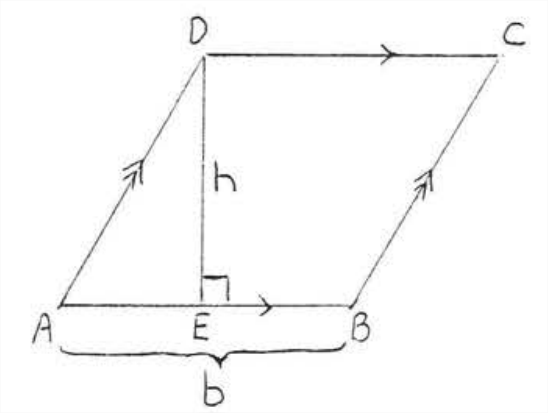
El área de un rombo se puede encontrar usando la fórmula para el área de un paralelogramo\(A=bh\), ya que un rombo es un tipo especial de paralelogramo (Figura\(\PageIndex{1}\)). Sin embargo, si se conocen las diagonales se puede usar la siguiente fórmula en su lugar (Figura\(\PageIndex{2}\)):
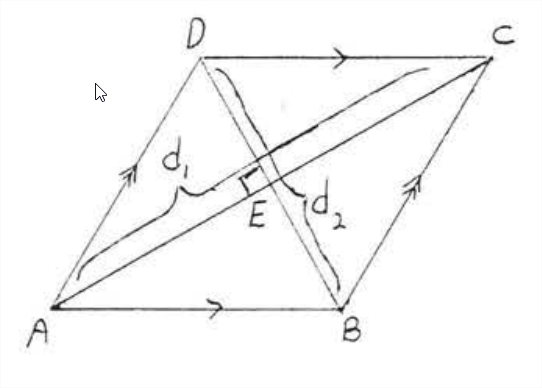
El área de un rombo es la mitad del producto de las diagonales.
\[A=\dfrac{1}{2} a_{1} a_{2}\]
- Prueba
-
Haciendo referencia a la Figura\(\PageIndex{2}\),
Área de\(\triangle ABC\) =\(\dfrac{1}{2} bh = \dfrac{1}{2} (AC)(BE) = \dfrac{1}{2} d_1 (\dfrac{1}{2} d_2) = \dfrac{1}{4} d_1d_2\).
Área de\(\triangle ADC\) =\(\dfrac{1}{2} bh = \dfrac{1}{2} (AC)(DE) = \dfrac{1}{2} d_1 (\dfrac{1}{2} d_2) = \dfrac{1}{4} d_1d_2\).
Área de rombo\(ABCD\) = Área de\(\triangle ABC\) + Área de\(\triangle ADC\) =\ dfrac {1} {4} d_1d_2 +\ dfrac {1} {4} d_1d_2 =\ dfrac {1} {2} d_1d_2\).
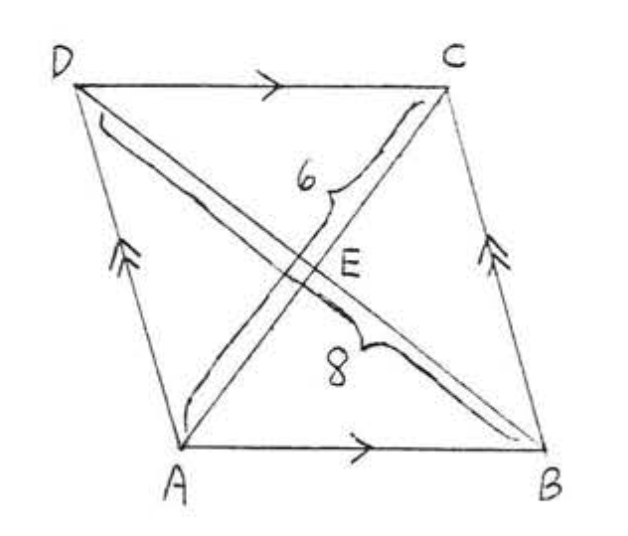
Encuentra el área del rombo:
Solución
\(A=\dfrac{1}{2} a_{1} d_{2}=\dfrac{1}{2}(8)(6)=\dfrac{1}{2}(48)=24\)
Respuesta: 24.
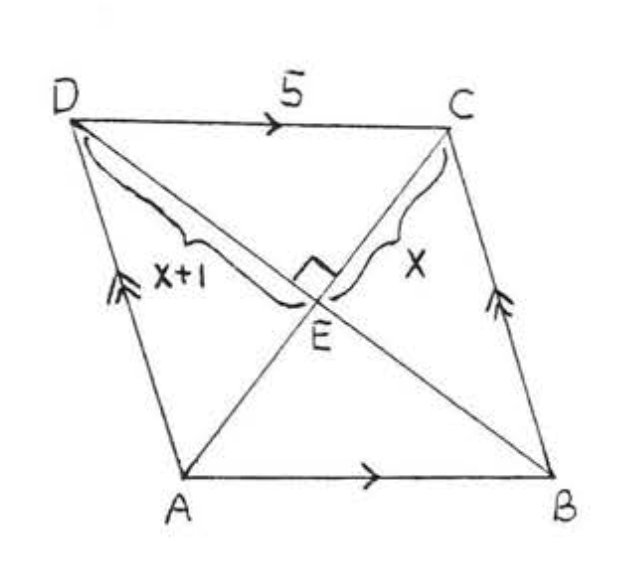
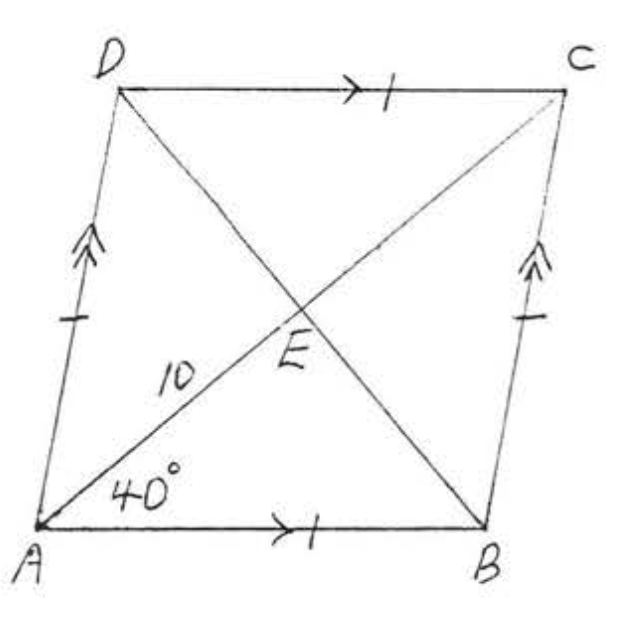
Encuentra el área y perímetro del rombo:
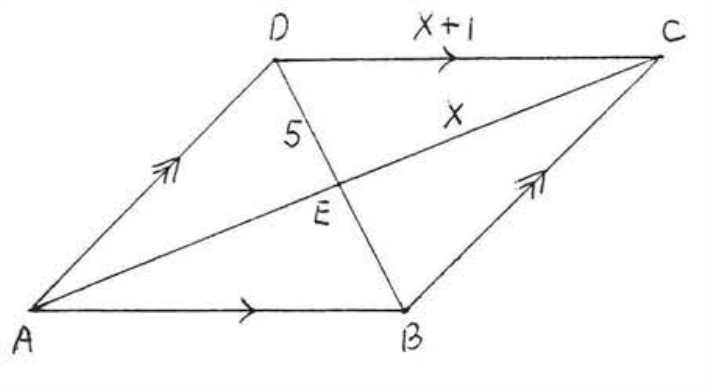
Solución
Las diagonales de un rombo son perpendiculares por lo que\(\triangle CDE\) es un triángulo rectángulo. Por lo tanto podemos aplicar el teorema de Pitágoras.
\[\begin{array} {rcl} {5^2 + x^2} & = & {(x+1)^2} \\ {25 + x^2} & = & {x^2 + 2x + 1} \\ {24} & = & {2x} \\ {12} & = & {x} \end{array}\]
\(d_1 = 12 + 12 = 24\). \(d_2 = 5 + 5 =10\). \(A = \dfrac{1}{2}d_1d_2 = \dfrac{1}{2} (24)(10) = 120\).
\(CD = x + 1 = 12 + 1= 13\).
Perímetro = 13 + 13 + 13 + 13 = 52.
Respuesta:\(A = 120\),\(P = 52\).
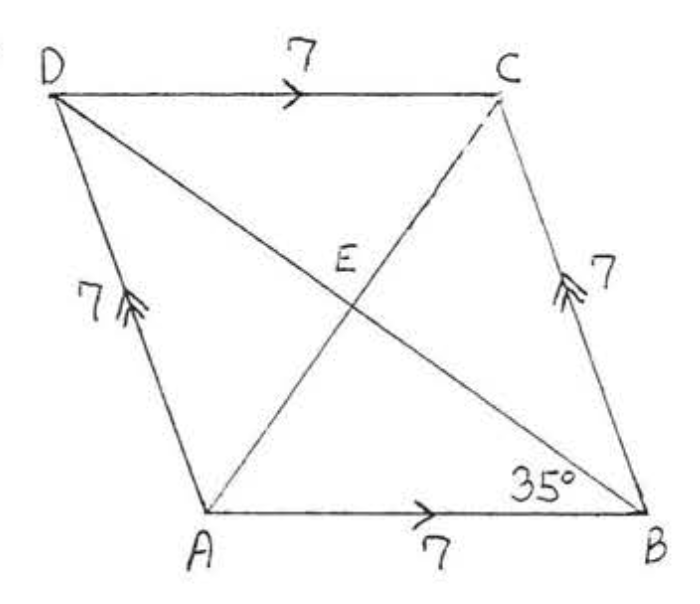
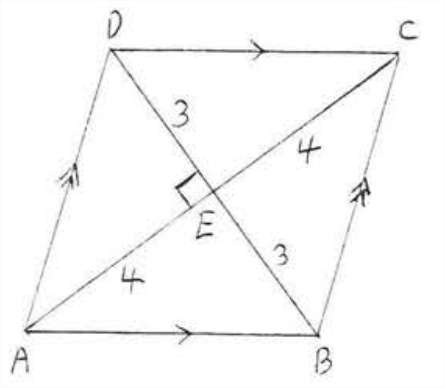
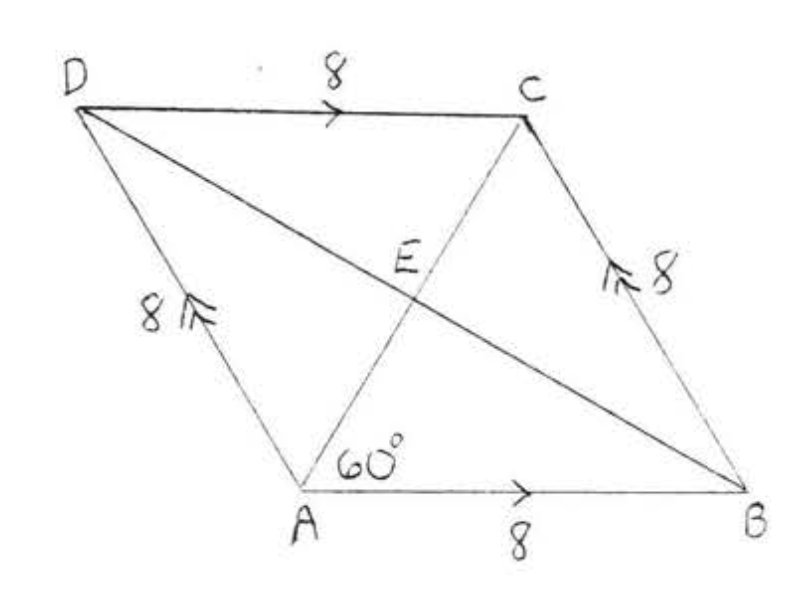
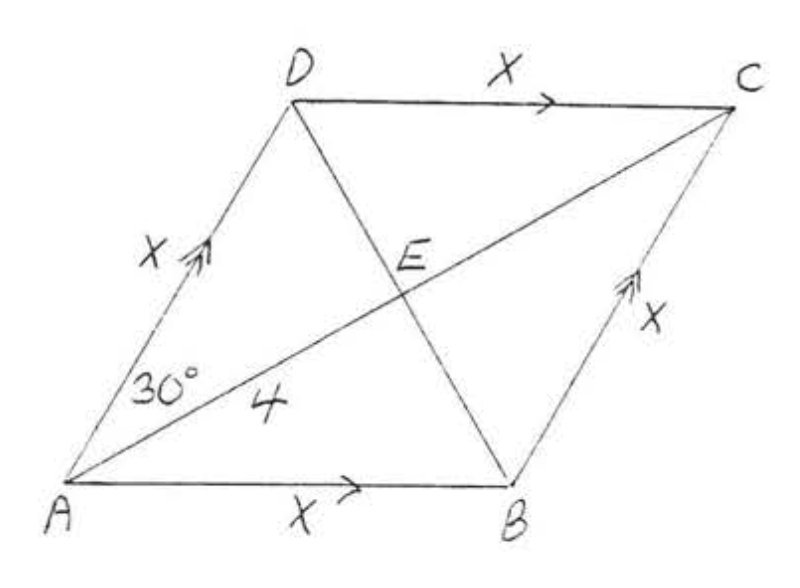
Encuentra el área del rombo:
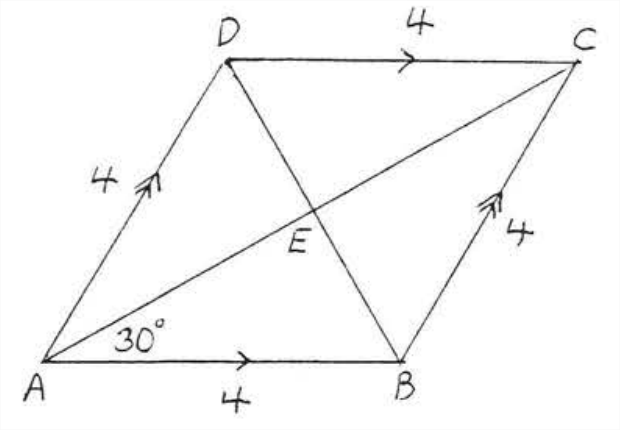
Solución
Al igual que en el Ejemplo 4.5.6 de la sección 4.5, obtenemos\(AC = 4\sqrt{3}\) y\(BD = 4\), Área =\(\dfrac{1}{2} d_1d_2 = \dfrac{1}{2} (AC)(BD) = \dfrac{1}{2}(4\sqrt{3})(4) = 8\sqrt{3}\).
Respuesta:\(A = 8\sqrt{3}\).
Problemas
1 - 2. Encuentra el área del rombo:
1.
2.
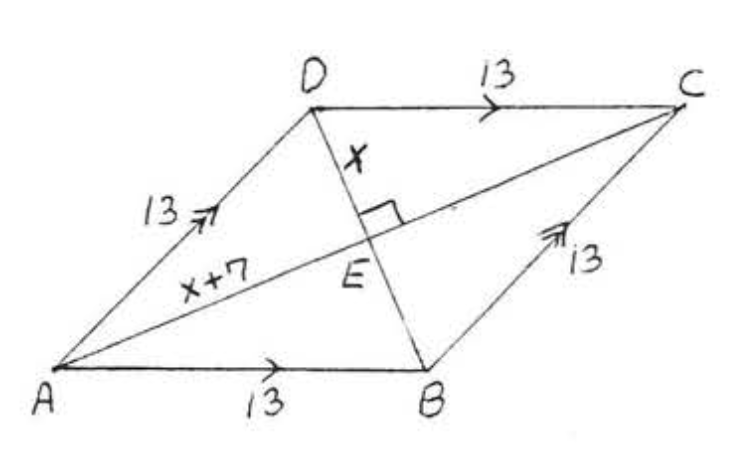
3 - 8. Encuentra el área y perímetro del rombo:
3.

4.
5.
6.
7.
8.
9 - 10. Encuentra el área a la décima más cercana:
9.
10.